 |
Creating buttons and check boxes
- The Submit button is labeled Submit Query, and sends data entered in the form to the CGI script for processing.
- The Reset button is labeled Reset, and clears the current data, resetting the form to its default values.
- Radio buttons let viewers select one item from a list. To make sure that the selection works properly, create logical groups of complementary radio buttons in the Form Radio Button Inspector.
- A custom button behaves exactly like a standard Reset, Submit, or Normal button, but you can customize its appearance. You can insert formatted or unformatted text, an image, or other content to make the form's user interface intuitive.
- The Check Box lets the viewer select multiple items from a list of options.
You can set up several types of buttons and check boxes on your Web page form.
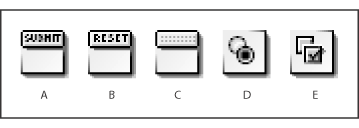
Form button and check box icons A. Submit Button icon B. Reset Button icon C. Custom Button icon D. Radio Button icon E. Check Box icon
To create a Submit, Reset, or Custom button:
- Drag the appropriate button icon from the Forms set in the Objects palette to your form. You can change the button in the Form Button Inspector.
- For a custom button, set Button to Normal in the Form Button Inspector. Do not use Submit or Reset; these names are reserved.
- In the Name text box of the Inspector, enter a description of your choice (for example, Send), or insert a Form Input Image placeholder and link it to a graphic.
- In the Value text box, specify an action or a value to be passed to the CGI script (if necessary).
- In the text box on the face of the button, type the label you want viewers to see. Use the Type or Style menu commands to format the label.
To create a Radio Button:
- Drag the Radio Button icon to your form and set the options in the Form Radio Button Inspector:
- In the Group text box, type a group name, or select an existing group name from the pop-up menu.
- In the Value text box, type a value or a descriptive name for the radio button that identifies it within the group. When a viewer clicks the Submit button in the form, this value is passed to the CGI script if the viewer selects the radio button.
- In the Focus section, select the Selected check box so the radio button appears selected by default.
- If necessary, drag a label icon from the Forms set in the Objects palette next to each button, and type your text. Repeat these steps for each button in the group.
To create a check box:
- Drag the Check Box icon to your form and set the options in the Form Check Box Inspector:
- In the Name text box, type a unique name to identify the check box.
- In the Value text box, type the value for the check box. When a viewer clicks the Submit button in the form, this value will be passed to the CGI script if the viewer selects the checkbox.
- In the Focus section, select the Selected check box so the check box appears selected by default.