
![[UWEC Web]](../../../Media/smuwec.gif)
Creating Websites Containing Embedded Jmole Images
Using Adobe GoLive
Adobe GoLive is a high-end web authoring application that can be used to create and manage websites. Today you will use GoLive to create a website that contains four pages: a homepage (index.html), plus three pages that can be accessed from the home page that are titled "Figure1", "Figure2" and "Figure3". You should call your site "Lab7" and place in your username_X share on the chemserver, where you can access it from a web browser. You should use the pdb file for flavodoxin (3nll) to create your Jmol images.
Assignment
- Before you get started, mount both your username_X and username_www shares. You will use the uswername_X share to store a version of your site which you will use for editing; the username_www share will be used to store the published version of your site, which will be accessible on the web.
- You will up a website called "Lab7". The best way to set up a website using Adobe GoLive is to let GoLive do it for you. Before you launch GoLive,, create a folder on you username_www called "Lab7". This is where the published site will end up; it will have the URL "http://www.chem.uwec.edu/Students/username_www/Lab7/index.html".
- After you have created this folder, launch GoLive. It will presents you with the option of creating a new document; click this option and select "Create Site". If GoLive is already open, you can alternatively select New... from the File menu and then click on "Create Site. GoLive will open a Wizard that leads you through the steps for creating a new site. I will demonstrate this to you in lab. When you are finished there will be a new folder on your username_X share that is called "Lab7". When opened, the contents of the "Lab7" folder should look something like this:
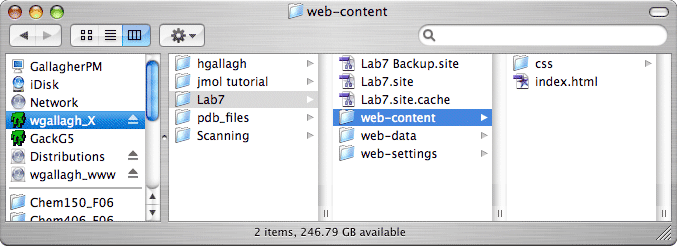
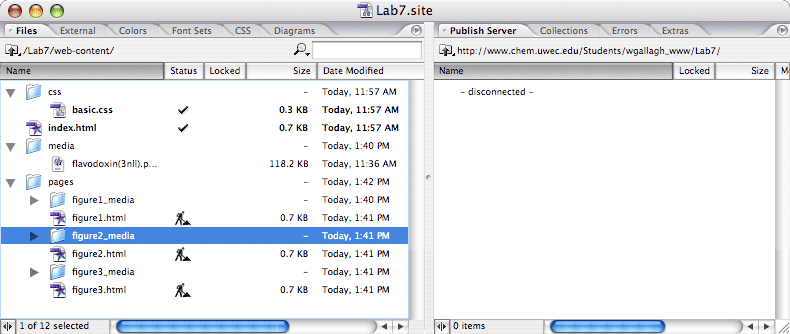
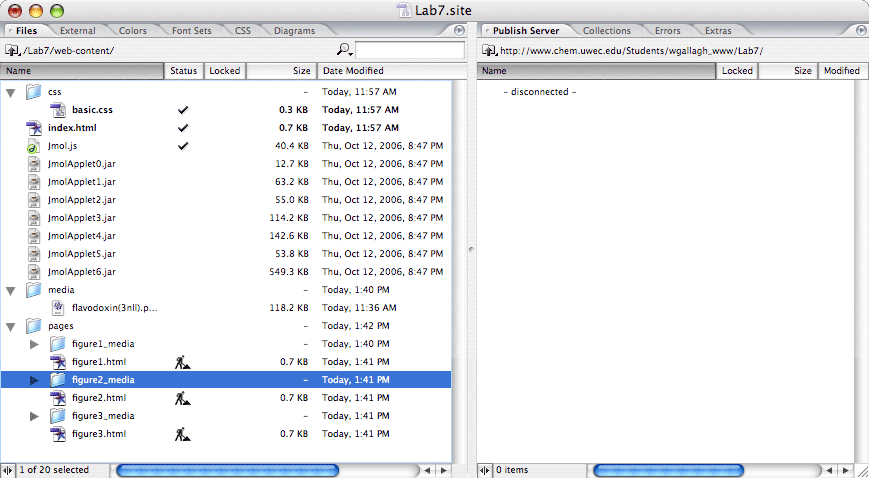
- This folder will contain the contents of your published site in a folder named "web-content". The contents of this folder are what is transferred to a web server. The other files and folders in the "Lab7" folder are for editing and managing the site. The file named "Lab7.site" is the one you open when you want to manage the site with GoLive. When opened, it presents you with the site management window:
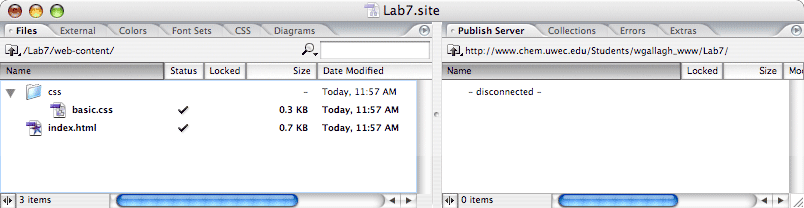
- When the Files tab in the left-hand pane is selected, this pane will show you the contents of your site. This is the window that you should use to create and mangage files within your site; do not use the Mac OS X Finder or Windows XP Explorer to do these functions.
- When the Published Server tab in the right-hand pane is selected, this pane will show you the contents of your site on the web server when you tell GoLive to connect to the server. You can see the URL to your published site in the banner above this pane.
- I will show how to use the site manamagement window to create the following components for your site:
- Work through the GoLiveJmol tutorial and then go ahead and create the contend for the four pages: the homepage (index.html), plus three pages that can be accessed from the home page that are titled "figure1.html", "figure2.html" and "figure3.html". When viewed in a browser, you pages should look like those shown below. Since these pages contain Jmol images, you will also need to set your site up with the jmolApplet files and the jmol.js library. Download and use the most recent version of the Jmol applet.
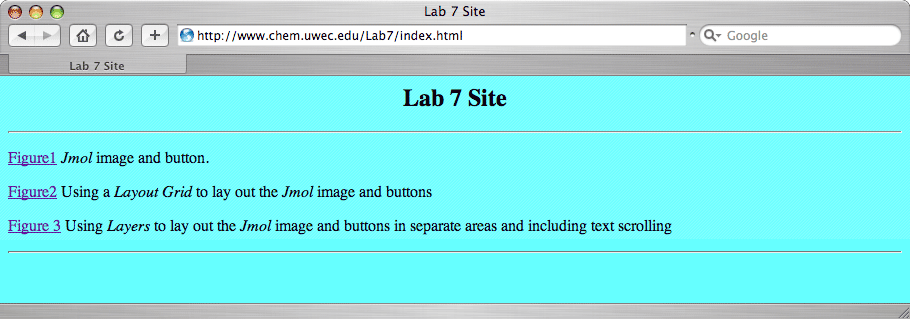
- Home Page: With links to Figure1, Figure2 and Figure3.
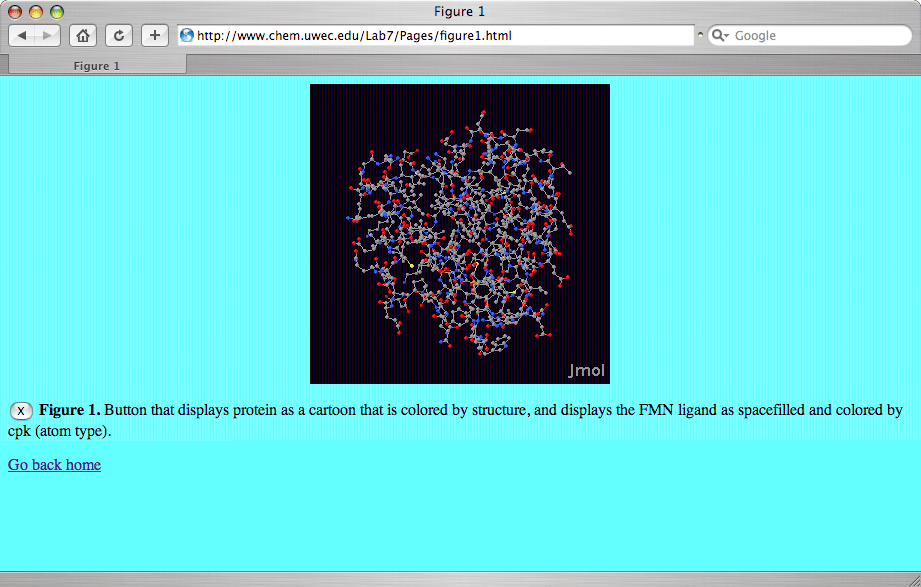
- Figure 1: A single page with an embedded chime image and one button. the page should look something like the one shown below. Title this page "Figure1"
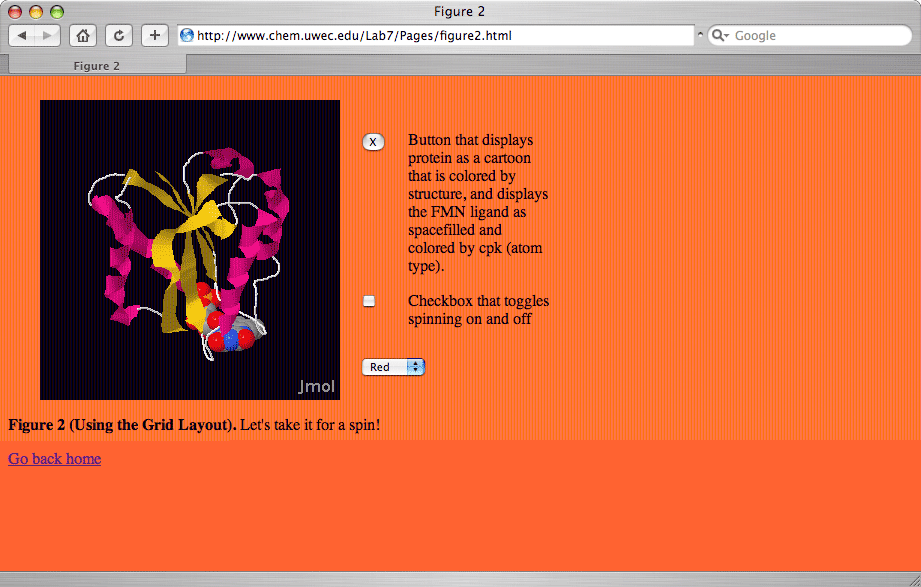
- Figure 2: A single page containing a table to lay out the Chime plug-in and buttons. Use GoLive's Grid layout feature to create table. Title this page "Figure2"
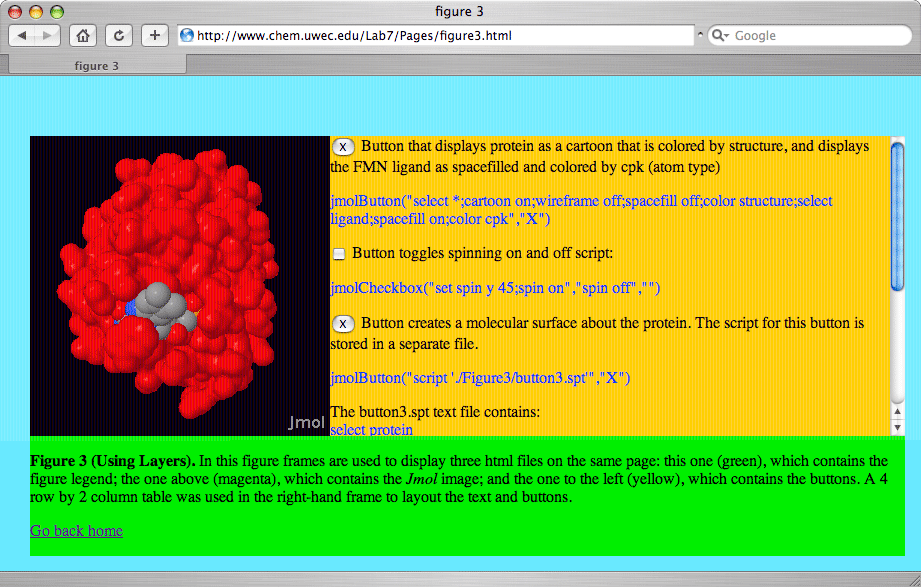
- Figure 3: A page containing three frames, each independently displaying a separate file. Place an embedded chime image in the left-hand frame and four buttons in the right-hand frame. A table should be used in the right-hand frame to lay outthe text and buttons. The page should look something like the one shown below. Title this page "Figure3". Because the right-hand frame is larger than what was displayed, you cannot see what the last button is suppose to do. Using frames allows you to scroll one frame independently of the others. To see this, open the Lab 7 Site in a separate browser window.
- The finished site can be view by going to "http://www.chem.uwec.edu/Lab7"
Resources
- The GoLiveJmol Site. This site provides additional examples of how to use GoLive to embed Jmol images into web pages, including:
- Page attribute, image files and hyperlinks
- Embedding Jmol images
- Using tables to lay out Jmol images and buttons
- Using GoLive's Grid Object to lay out Jmol images and buttons
- Using Layers to lay out Jmol images and scroling text
- Using script files to supply Rasmol scripts to Jmol control elements
- Using image maps to make hyperlinks
updated: Wednesday, November 1, 2006