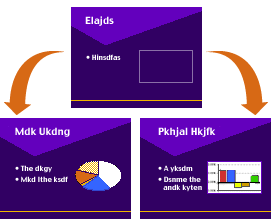
To reuse specific visual elements and text in your presentation, use master slides. A master slide makes it easy to give your slides a consistent look. You can use multiple master slides in a presentation.
Note: If you make changes to a master slide, slides already created with that master slide do not reflect those changes.
Master slide

To set up a master slide:
1
Click the master tab in the Controls window.
![]()
2
Edit the master slide as you would edit a page in a drawing document or any other slide.
For example, you can use the drawing tools in the Tools window, you can insert images or clippings, and you can set colors and other attributes.
If you don't see the Controls window:
Choose Show Presentation Controls from the Window menu.
To create additional master slides for a presentation:
•
Click the plus (+) button.
To use a master slide for the next slide you create:
•
Select the master slide in the master panel, then click the slide tab and click the plus (+) button.
![]()
To edit a master slide:
•
Select the thumbnail image of the slide in the master panel and edit the slide as you would edit a drawing document or any other slide.
To delete a master slide:
•
Select the thumbnail image of the slide in the master panel and click the minus (-) button.
Tip: To create a background that appears in all slides in the presentation document, choose Edit Background from the Options menu. Create the background, then choose Edit Background again. If you make subsequent changes to the background, those changes are reflected in all slides.
Table of contents | Index